Lambda Layerを利用して、Lambda上でAWS CLIを実行する方法をメモします。
はじめに
こんにちは、@bioerrorlogです。
Lambda上でAWS CLIを実行したいと思いました。
AWS CLIにはs3 syncコマンドのような、SDKには未実装の便利な機能があるためです。
しかし、Lambdaの実行環境にはAWS CLIはプリインストールされていないので、ひと工夫が必要になります。
カスタムランタイムやコンテナサポート機能を利用する方法もありますが、今回はLambda Layerを利用してLambda上でAWS CLIを実行してみます。
LambdaでAWS CLIを実行する
以下の手順でやっていきます。
- Python仮想環境の作成
- 仮想環境にAWS CLIをインストール
- Python実行パスの変更
- AWS CLI関連パッケージをzipファイルにまとめる
- Lambda Layerの作成
- Lambda関数にLambda Layerをアタッチ
- Lambda関数でAWS CLIを実行
Python仮想環境の作成
任意の環境にAWS CLIをインストールするためのPython仮想環境を作成します。
ローカルやEC2等どこでも大丈夫ですが、今回はCloud9(Amazon Linux 2)を利用しました。
まず、Pythonがインストールされていることを確認します。
$ python3 --version
Python 3.7.9

$ pip3 --version
pip 9.0.3 from /usr/lib/python3.7/site-packages (python 3.7)
Pythonがインストールされていることが確認できたら、任意の場所で仮想環境を作成、activateします。
# 仮想環境用ディレクトリを作成
mkdir awscli-virtualenv

# 仮想環境を作成
python3 -m venv awscli-virtualenv

# 仮想環境を開始
cd awscli-virtualenv/bin/
source activate
仮想環境にAWS CLIをインストール
次は、仮想環境にAWS CLIをインストールします。 仮想環境がactivateされたまま、pipでインストールします。
# AWS CLIのインストール
pip install awscli
Python実行パスの変更
次は、Python実行パスを変更します。
AWS CLI実行ファイルawsの1行目にはPythonへの実行パスが指定されていますが、そのパスは現在作成している仮想環境に合わせたものになっています。
これをLambda用のパスに変更する必要があります。
$ cat aws
#!/home/ec2-user/environment/awscli-virtualenv/bin/python3
# Copyright 2012 Amazon.com, Inc. or its affiliates. All Rights Reserved.

# Licensed under the Apache License, Version 2.0 (the "License"). You
# may not use this file except in compliance with the License. A copy of
# the License is located at

#     http://aws.amazon.com/apache2.0/

# or in the "license" file accompanying this file. This file is
# distributed on an "AS IS" BASIS, WITHOUT WARRANTIES OR CONDITIONS OF
# ANY KIND, either express or implied. See the License for the specific
# language governing permissions and limitations under the License.
import sys
import os

if os.environ.get('LC_CTYPE', '') == 'UTF-8':
    os.environ['LC_CTYPE'] = 'en_US.UTF-8'
import awscli.clidriver


def main():
    return awscli.clidriver.main()


if __name__ == '__main__':
    sys.exit(main())
今回の私のケースだと、Python実行パスは#!/home/ec2-user/environment/awscli-virtualenv/bin/python3に指定されています。
これをLambdaで実行するために、Lambda実行環境に合わせた!/var/lang/bin/pythonに変更します。
sed -i "1s/.*/\#\!\/var\/lang\/bin\/python/" aws
これで、awsファイルの1行目が#!/var/lang/bin/pythonに変更されました。
$ cat aws
#!/var/lang/bin/python
# Copyright 2012 Amazon.com, Inc. or its affiliates. All Rights Reserved.

# Licensed under the Apache License, Version 2.0 (the "License"). You
# may not use this file except in compliance with the License. A copy of
# the License is located at

#     http://aws.amazon.com/apache2.0/

# or in the "license" file accompanying this file. This file is
# distributed on an "AS IS" BASIS, WITHOUT WARRANTIES OR CONDITIONS OF
# ANY KIND, either express or implied. See the License for the specific
# language governing permissions and limitations under the License.
import sys
import os

if os.environ.get('LC_CTYPE', '') == 'UTF-8':
    os.environ['LC_CTYPE'] = 'en_US.UTF-8'
import awscli.clidriver


def main():
    return awscli.clidriver.main()


if __name__ == '__main__':
    sys.exit(main())
AWS CLI関連パッケージをzipファイルにまとめる
では次に、インストールしたAWS CLI関連パッケージを、Lambda Layerにアップロードするためにzipにまとめます。
# 仮想環境を終了
deactivate

# Lambda Layerアップロード用のディレクトリを作成
cd ../..
mkdir awscli-lambda-layer
cd awscli-lambda-layer

# AWS CLI関連パッケージをコピー
cp ../awscli-virtualenv/bin/aws .
cp -r ../awscli-virtualenv/lib/python3.7/site-packages/* .
ここでコピーしたAWS CLI関連パッケージの構成は以下です。
# コピーしたファイルを確認
$ ls
aws                         dateutil                   pip-20.1.1.dist-info             rsa                          six.py
awscli                      docutils                   pkg_resources                    rsa-4.5.dist-info            urllib3
awscli-1.18.176.dist-info   docutils-0.15.2.dist-info  pyasn1                           s3transfer                   urllib3-1.25.11.dist-info
botocore                    easy_install.py            pyasn1-0.4.8.dist-info           s3transfer-0.3.3.dist-info   yaml
botocore-1.19.16.dist-info  jmespath                   __pycache__                      setuptools                   _yaml.cpython-37m-x86_64-linux-gnu.so
colorama                    jmespath-0.10.0.dist-info  python_dateutil-2.8.1.dist-info  setuptools-47.1.0.dist-info
colorama-0.4.3.dist-info    pip                        PyYAML-5.3.1-py3.7.egg-info      six-1.15.0.dist-info
ここまできたら、あとはzipにまとめます。
# AWS CLI関連パッケージをzipにまとめる。
zip -r ../awscli-lambda-layer.zip *
Lambda Layerの作成
次は、作成したzipファイルからLambda Layerを作成します。
Lambda Layerの作成にはaws cliのpublish-layer-versionコマンドを使用します。
今回はPythonランタイムでLambdaを作成するので、--compatible-runtimesにはPython3.6とPython3.7、Python3.8を指定しています。
# Lambda Layerの作成
cd ..
aws lambda publish-layer-version --layer-name aws-cli --description "for aws cli" \
    --zip-file fileb://awscli-lambda-layer.zip --compatible-runtimes python3.6 python3.7 python3.8
これでLambda Layerが作成されました。
マネジメントコンソール上で見に行くと、次のようにLambda Layerが作成されていることが確認できます。

Lambda関数にLambda Layerをアタッチ
次は、Lambda関数にLambda Layerをアタッチします。
これは、以下の手順でコンソールから簡単にアタッチすることが出来ます。

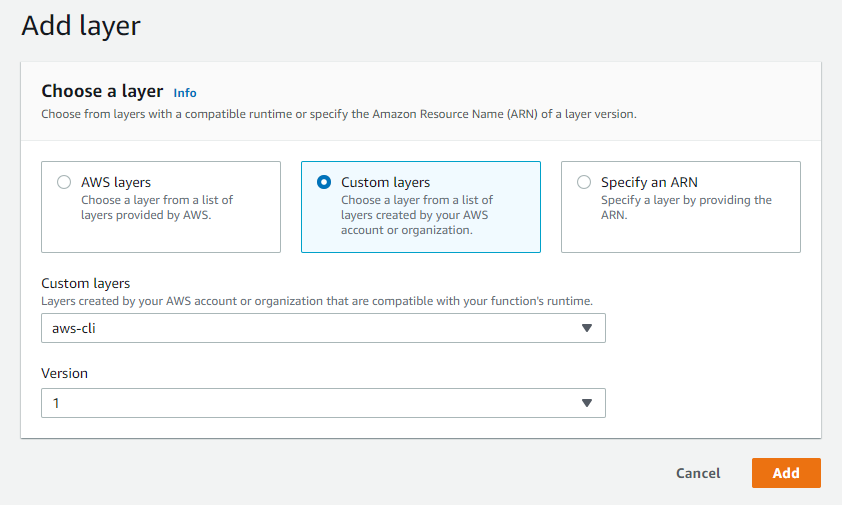
これで、Lambda Layerがアタッチされました。
Lambda関数でAWS CLIを実行
それではいよいよ、LambdaでAWS CLIを実行します。
今回は、以下のPythonコードを実行します。
import subprocess
import logging

logger = logging.getLogger()
logger.setLevel(logging.INFO)

def run_command(command):
    command_list = command.split(' ')

    try:
        logger.info("Running shell command: \"{}\"".format(command))
        result = subprocess.run(command_list, stdout=subprocess.PIPE);
        logger.info("Command output:\n---\n{}\n---".format(result.stdout.decode('UTF-8')))
    except Exception as e:
        logger.error("Exception: {}".format(e))
        return False

    return True

def lambda_handler(event, context):
    run_command('/opt/aws --version')
※コードはこちらを参考にしています。
そのまま実行すると3秒のタイムアウトに掛かってしまうので、タイムアウト時間は適度に伸ばしておく必要があります。
CLIの実行には、Pythonのsubprocess.run()を使用しています。
AWS CLIコマンドは、awsの代わりに/opt/awsに続く形で指定して実行します。
Lambda LayerとしてアタッチしたAWS CLIの実行ファイルawsが、/opt/awsに格納されているためです。
上記のコードを実行した結果、以下のようにAWS CLIのバージョンが表示されれば成功です。
---
aws-cli/1.18.176 Python/3.8.5 Linux/4.14.193-110.317.amzn2.x86_64 exec-env/AWS_Lambda_python3.8 botocore/1.19.16

---
同様に、他のAWS CLIコマンドも実行することが出来ます。
おわりに
今回はLambda Layerを使って、Lambda上でAWS CLIを実行する方法を書きました。
s3 sync等、AWS CLIの便利な高レベルコマンドを手軽に使いたいときなど、役に立つかもしれません。
カスタムランタイムやコンテナサポート機能を使う手もあるので、そちらも試してみたいものです。
[関連記事]
参考
How to use AWS CLI within a Lambda function (aws s3 sync from Lambda) :: Ilya Bezdelev
amazon web services - Call aws-cli from AWS Lambda - Stack Overflow