おはよう。@bioerrorlogです。
ProcessingによるGenerative Art作品
11作目を記録します。
自作品まとめはこちら: www.bioerrorlog.work
Output


フル解像度/その他出力パターンはこちら:
Generative_11 - BioErrorLog - pixiv
Material
使用言語: Processing 3.5.3
Processingというプログラミング言語に聞き覚えがない、という方は是非こちらをご参考ください:
www.bioerrorlog.work
Source Code
GitHubはこちら
/*
Modified from:

Daniel Shiffman
Coding Challenge #24: Perlin Noise Flow  Field
https://youtu.be/BjoM9oKOAKY
https://github.com/CodingTrain/website/tree/master/CodingChallenges/CC_024_PerlinNoiseFlowField
*/


FlowField flowfield;
ArrayList<Particle> particles;


void setup() {
  size(1920, 1080);

  flowfield = new FlowField(2); // 引数からflowfieldを構成するベクターの数が算出・定義される
  flowfield.update();

  particles = new ArrayList<Particle>();
  for (int i = 0; i < 1000000; i++) {// 生成するParticlesの数を指定
    PVector start = new PVector(random(width), random(height));
    particles.add(new Particle(start, random(2, 8)));
  }
  background(255);
}


void draw() {
  println(frameCount);
  background(255);
  flowfield.update();

  for (Particle p : particles) {
    p.follow(flowfield);
    p.run();
  }

  saveFrame("frames/generative_10_#####.png"); // 各フレームで画像を保存
}


void keyPressed(){
    /*
    BACKSPACEキー押下: リセット
    */

    if (keyCode == BACKSPACE){
        setup();
    }
}


public class FlowField {
  /*
  画面に配置されるベクターの集合体
  画面中央に向かう(ただしnoiseの影響を受ける)
  Particlesの動きに力を加える
  */

  PVector[] vectors;
  int cols, rows;
  float inc = 0.1;
  float zoff = 0;
  int scl;

  FlowField(int res) {
    scl = res;
    cols = floor(width / res) + 1;
    rows = floor(height / res) + 1;
    vectors = new PVector[cols * rows];
  }

  void update() {
    // flowfield状態を定義
    // フレームごとに呼び出される

    float xoff = 0;
    for (int y = 0; y < rows; y++) {
      float yoff = 0;
      for (int x = 0; x < cols; x++) {

        // add: 各ベクターにノイズを加えるためのベクター
        float angle = noise(xoff, yoff, zoff) * radians(360*2); // ここでベクターの角度を定義
        PVector add = PVector.fromAngle(angle); // ベクター生成
        add.setMag(50); // ノイズ用ベクターの大きさを定義

        // v: 本命のベクター
        // 画面中央に向かう
        PVector v = new PVector(cols/2-x, rows/2-y, 0);
        v.add(add);
        v.setMag(random(0.01)); // ベクターの大きさは小さくする

        int index = x + y * cols;
        vectors[index] = v;

        xoff += inc;
      }
      yoff += inc;
    }
    zoff += 0.004;
  }
}


public class Particle {
  /*
  ひとつの粒子
  動きはflowfieldのベクターから影響を受ける
  */

  PVector pos;
  PVector vel;
  PVector acc;
  PVector previousPos;
  float maxSpeed;

  Particle(PVector start, float maxspeed) {
    maxSpeed = maxspeed;
    pos = start;
    vel = new PVector(0, 0);
    acc = new PVector(0, 0);
    previousPos = pos.copy();
  }
  void run() {
    update();
    edges();
    show();
  }
  void update() {
    pos.add(vel);
    vel.limit(maxSpeed);
    vel.add(acc);
    acc.mult(0);
  }
  void applyForce(PVector force) {
    acc.add(force);
  }
  void show() {
    // 描画処理

    noStroke();
    fill(0, 50); // ここで粒子の色を調整
    ellipse(pos.x, pos.y, 1, 1); // ここで粒子の大きさを調整
    updatePreviousPos();
  }

  void edges() {
    // 画面端の処理

    if (pos.x > width) {
      pos.x = 0;
      updatePreviousPos();
    }
    if (pos.x < 0) {
      pos.x = width;
      updatePreviousPos();
    }
    if (pos.y > height) {
      pos.y = 0;
      updatePreviousPos();
    }
    if (pos.y < 0) {
      pos.y = height;
      updatePreviousPos();
    }
  }

  void updatePreviousPos() {
    this.previousPos.x = pos.x;
    this.previousPos.y = pos.y;
  }

  void follow(FlowField flowfield) {
    // Flowfieldから受ける力を適用

    int x = floor(pos.x / flowfield.scl);
    int y = floor(pos.y / flowfield.scl);
    int index = x + y * flowfield.cols;

    PVector force = flowfield.vectors[index];
    applyForce(force);
  }
}
Discussion
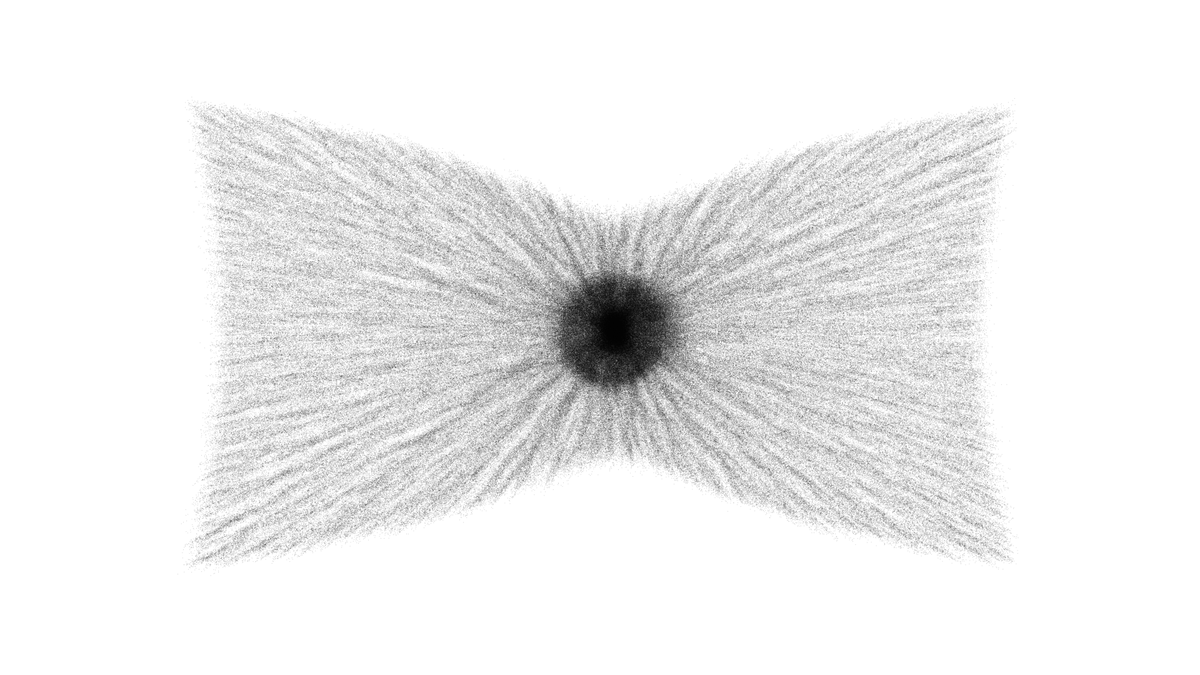
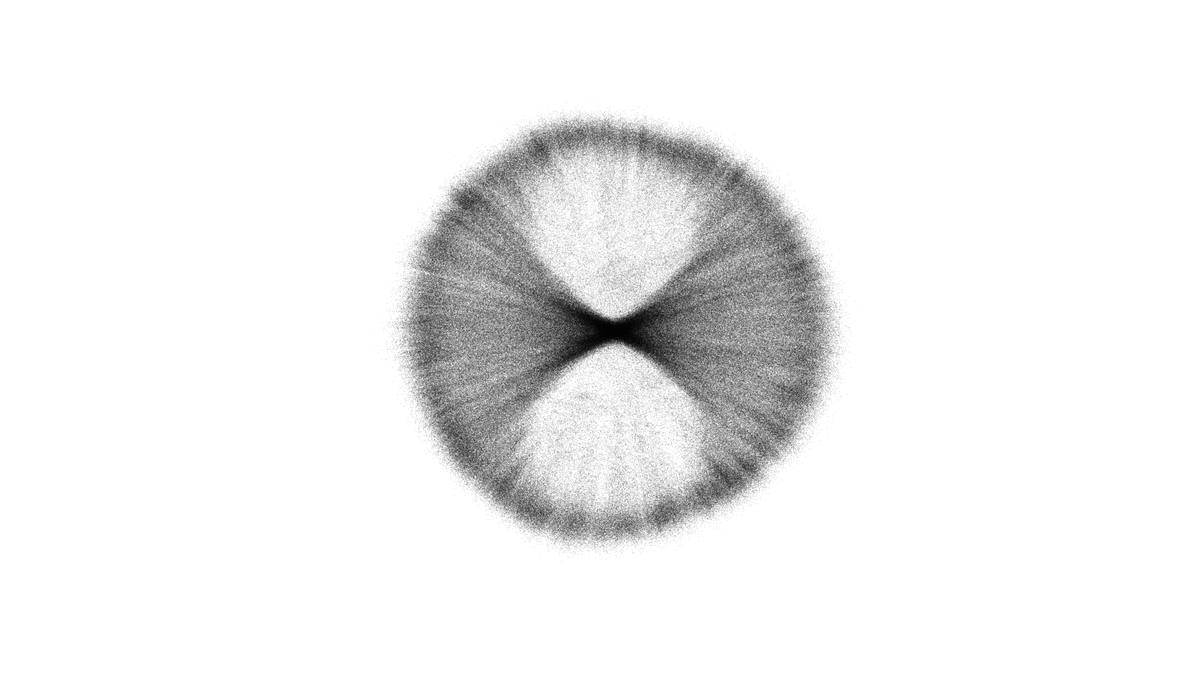
前回同様、Daniel ShiffmanのPerlin Noise Flow Fieldの実装コードを参考にしました。
画面に格子状に配置されるベクターを定義するFlowfieldクラスを用いて、画面中央に向かう流れをつくりました。
ちょっとした遊び心として、各ベクターにはnoiseによる揺らぎを与えています。
そこにParticleクラスを用いて、1,000,000個の粒子を配置し、動きを動画化しました。
Flowfieldによる流れをごく小さくすることによって、粒子が中央に集まったあともそのまま通り過ぎては拡散し、そしてまた中央へ収縮をはじめる、という繰り返しを見ることが出来ます。
See also
Reference
Coding Challenge #24: Perlin Noise Flow Field - Daniel Shiffman
Coding Challenge #24: Perlin Noise Flow Field - Daniel Shiffman - GitHub